Graphic designers work at the intersection of precision and creativity — and both demand a desk setup that is ergonomically sound and spatially organized. Pixel-perfect design work requires a color-accurate monitor at exactly the right distance and angle. Long hours at a graphics tablet demand neutral wrist positioning. Reference materials, styluses, and Pantone guides all need a designated place so the desk remains a space that invites creative thought rather than visual stress.
A well-built desk setup for graphic designers is not just about aesthetics — though it should look inspiring. It is about protecting your eyes, wrists, and neck through the sustained, precise work that defines the profession. If you want a clean starting foundation, the TidySetup Starter Kit gives you the ergonomic base that every layer in this guide builds on.
In this guide, I’ll walk through every element of the ideal graphic designer desk setup: monitor selection and positioning, graphics tablet ergonomics, keyboard and mouse placement, desk organization, and the lighting conditions that let you trust what you see on screen.
What Makes a Graphic Designer’s Desk Setup Different?
Three specific demands set a graphic designer’s ergonomic needs apart from a general office worker’s. First, color accuracy is a professional requirement — the monitor must reproduce color faithfully, and the lighting around it must not distort color perception. Second, graphics tablet use introduces unique wrist ergonomics — the tablet’s position relative to the monitor directly affects neck angle and forearm strain. Third, design work alternates between macro and micro tasks — zooming out to review layouts, then zooming in to pixel-level detail — which creates specific eye strain patterns that must be managed.
“An ergonomic workstation for a graphic designer is one configured not only to support the body’s natural posture, but to protect the precision of color perception — meaning monitor calibration, ambient lighting temperature, and tablet positioning are all ergonomic variables, not just aesthetic ones.”
The Designer Ergonomics Risk Profile
- Eyes — Highest risk area; extended focus on color-rich, high-contrast screen content accelerates digital eye strain
- Wrists and forearms — Graphics tablet use involves precise, fine motor movements that accumulate repetitive strain
- Neck — Alternating between tablet surface and monitor creates a repetitive head-tilt cycle if positions are misaligned
- Shoulders — Tablet placed too far from the body causes forward shoulder rotation and trapezius tension
How Should a Graphic Designer Position Their Monitor?
Monitor positioning is particularly critical for designers because both ergonomics and color fidelity depend on it. The correct ergonomic position — top third of the screen at your natural line of sight, at 20–30 inches viewing distance — must be maintained without compromising the viewing angle required for accurate color rendering.
Monitor Selection for Graphic Designers
Not all monitors are suitable for professional design work. The key specifications that matter ergonomically and professionally are:
| Specification | Minimum for Design Work | Ideal for Design Work |
|---|---|---|
| Panel type | IPS (In-Plane Switching) | IPS or OLED |
| Color gamut | 95% sRGB | 99% sRGB + P3 wide gamut |
| Resolution | 2560×1440 (QHD) | 3840×2160 (4K UHD) |
| Screen size | 24 inches | 27–32 inches |
| Brightness | 250 cd/m² | 350+ cd/m² |
| Color calibration | Factory calibrated | Hardware-calibratable |
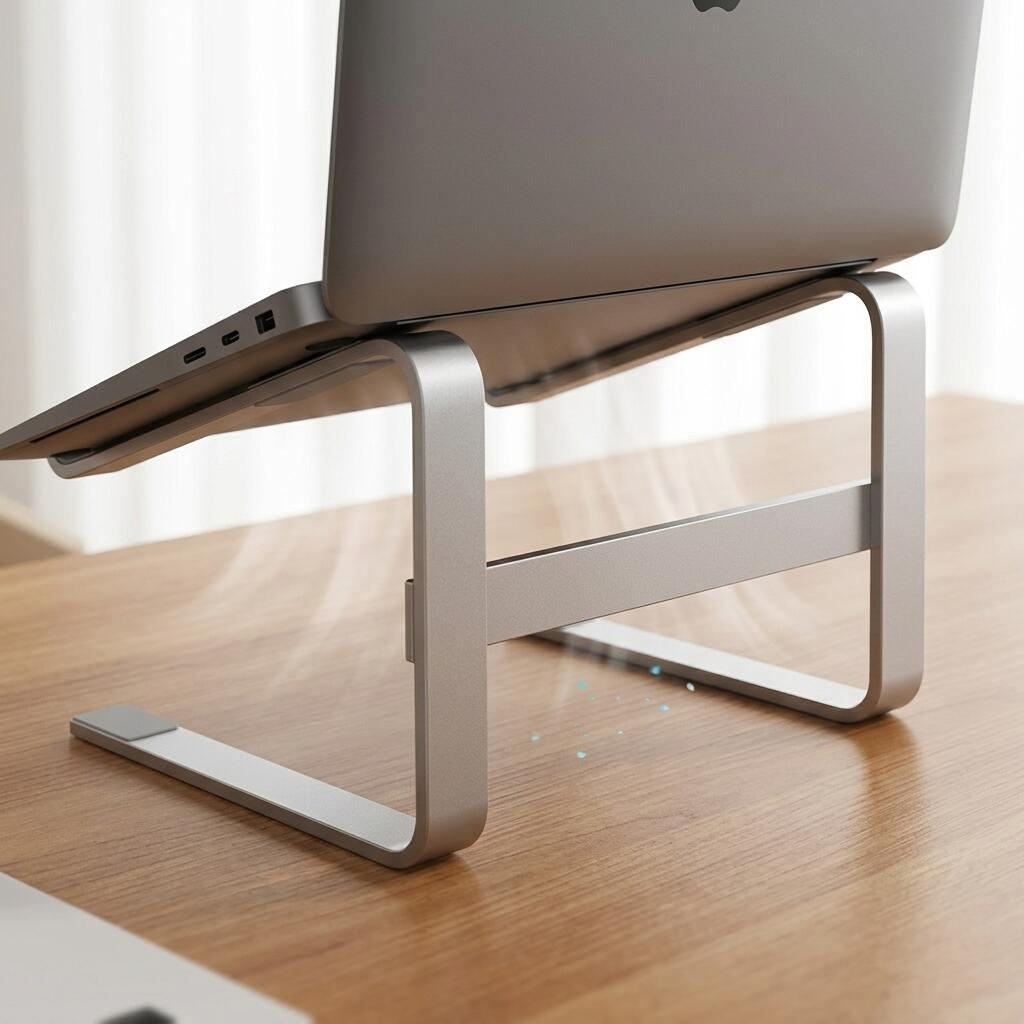
A monitor arm is essential for designers. It allows precise height adjustment so the screen top aligns with your eye level, and it frees the desk surface for your tablet, reference materials, and working tools. For a full guide on monitor arm setup, see our monitor arm positioning guide.
Lighting and Color Accuracy
This is where designer ergonomics diverges from general office ergonomics. The ambient light in your workspace affects how your eye perceives color on screen. A room lit with warm 2,700K light makes you perceive colors as warmer than they actually are. A room with cool 6,500K light skews perception toward blue.
- Ideal ambient color temperature for design work: 5,000K–6,500K — This matches the D65 standard white point used in most professional displays and print proofing
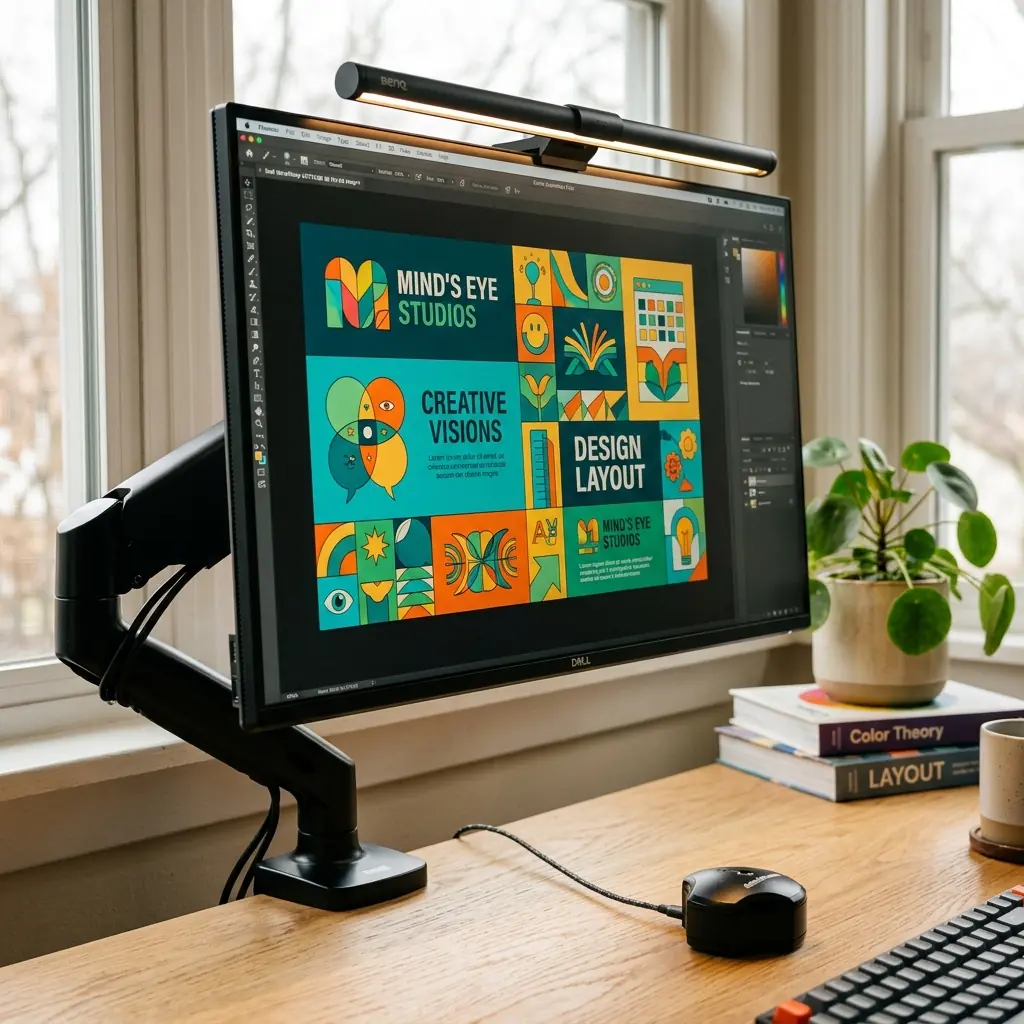
- Use a monitor light bar, not a desk lamp angled at the screen — The asymmetric beam illuminates your desk without casting light on the screen face, which causes glare and color distortion
- Calibrate your monitor regularly — A hardware colorimeter recalibrates your display to its true color output, which drifts over time
- Never work with direct sunlight on the screen — Position the desk perpendicular to the window; use diffusing blinds during peak sun hours
“Color calibration is an ergonomic act for designers. A monitor displaying inaccurate color forces the designer to apply mental correction constantly — a form of sustained cognitive load that contributes to fatigue and decision-making errors over long sessions.”
How Should a Graphics Tablet Be Positioned Ergonomically?
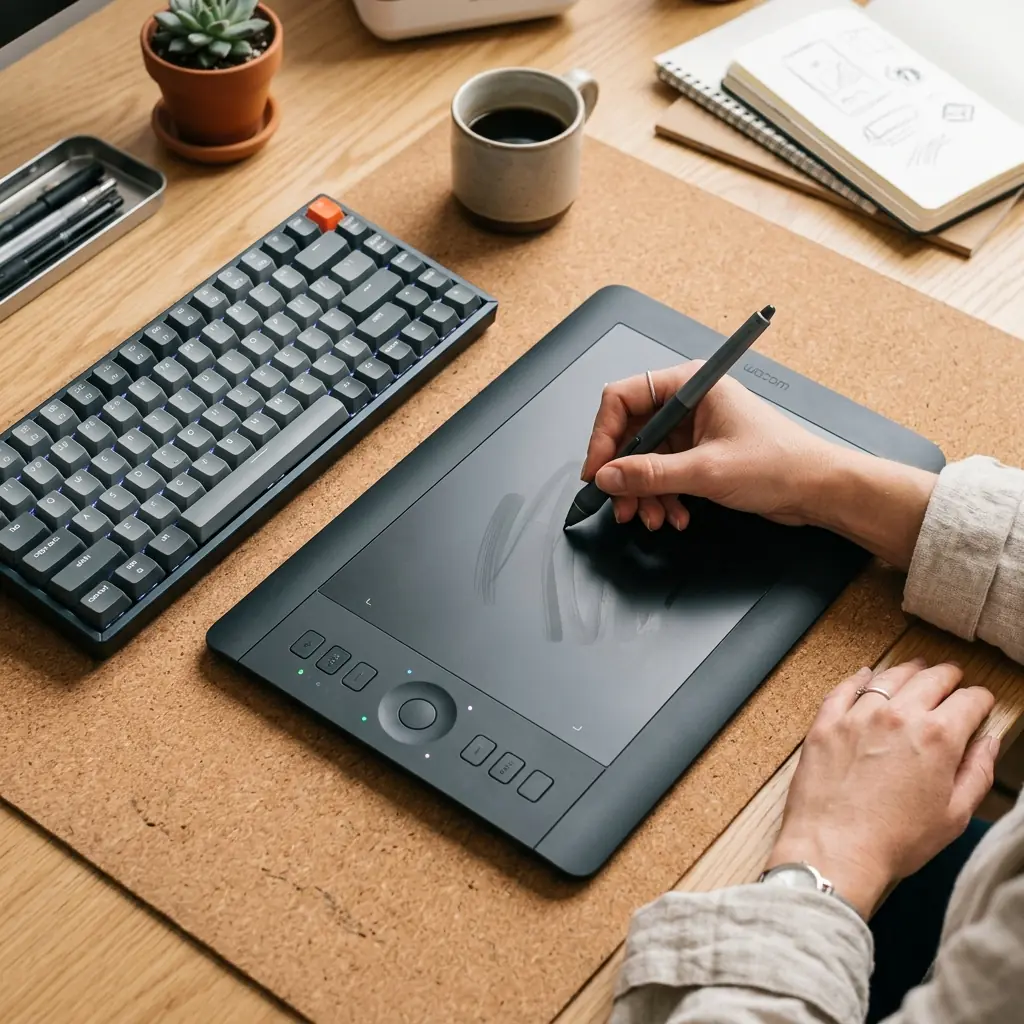
Graphics tablet positioning is the ergonomic variable most frequently overlooked in a designer’s setup — and it is often the root cause of neck pain, shoulder tension, and wrist strain in this profession. The tablet’s position on the desk directly determines whether your head, neck, and wrist remain in neutral alignment as you work.
Graphics Tablet Placement Rules
- Center the tablet below the monitor — The tablet’s active area should be centered directly below your screen, not off to one side. Working with a laterally offset tablet forces constant lateral neck rotation.
- Position the tablet close to the body — The top edge of the tablet should be no more than 6–8 inches from the keyboard. Reaching forward to the tablet strains the shoulder and rotates the torso forward.
- Match the tablet’s active area to the monitor’s aspect ratio — Using a 4:3 tablet active area with a 16:9 monitor compresses horizontal strokes and forces compensatory arm movements.
- Keep the stylus rest on the dominant-hand side — Reduces the reach distance when picking up and setting down the stylus dozens of times per hour.
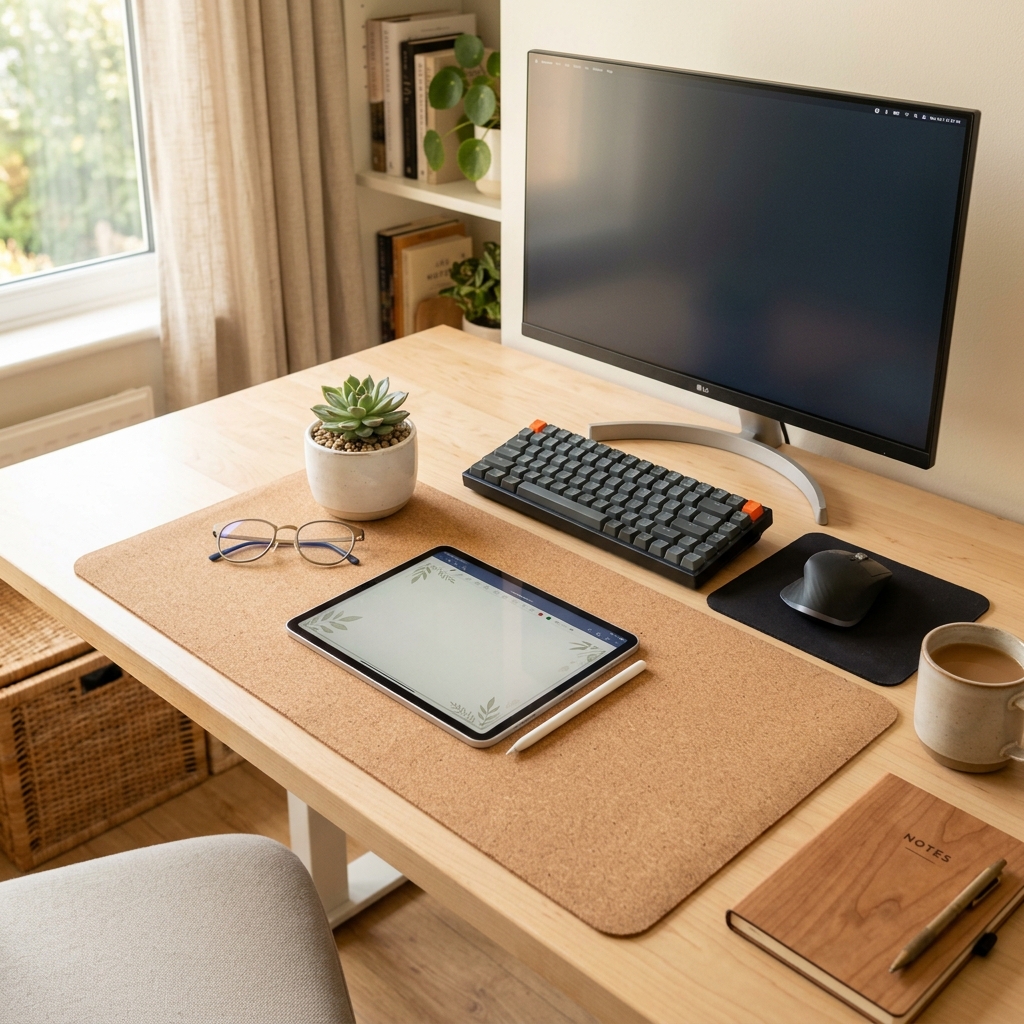
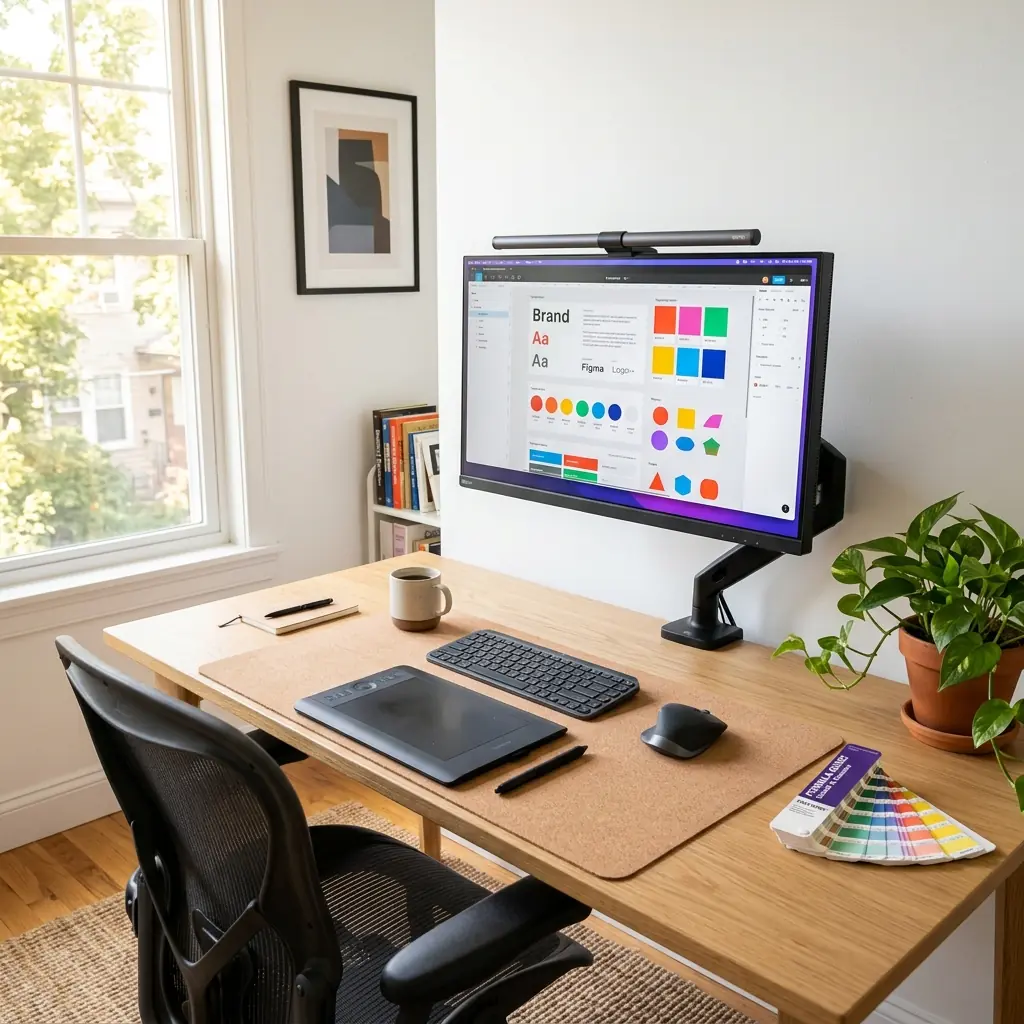
- Use a cork desk mat under the tablet — Provides a non-slip surface, cushions forearm contact, and defines the tablet’s position so it does not drift during long sessions.
During a workspace evaluation I conducted for a UX design team at a mid-size agency, I found that every designer who reported neck and shoulder pain had their graphics tablet positioned to one side — typically on the non-dominant hand side — forcing a constant lateral head turn to look between the tablet and monitor. Recentering the tablets below the monitor resolved the pattern in the majority of cases within one week.
Medium vs. Large Tablet: Ergonomic Considerations
| Tablet Size | Active Area | Arm Movement | Best For |
|---|---|---|---|
| Small (6″×4″) | Limited range | Wrist and finger movement | Photo retouching, tight spaces |
| Medium (8″×6″) | Balanced range | Wrist and forearm movement | Most design workflows, best ergonomic balance |
| Large (12″×8″) | Full screen mapping | Full arm movement | Illustration, detailed painting, 4K monitors |
For most graphic designers using a 27″ monitor, a medium-sized tablet provides the best balance between precision and ergonomic arm range. A large tablet on a small desk forces the tablet to be pushed back, increasing forward reach distance.
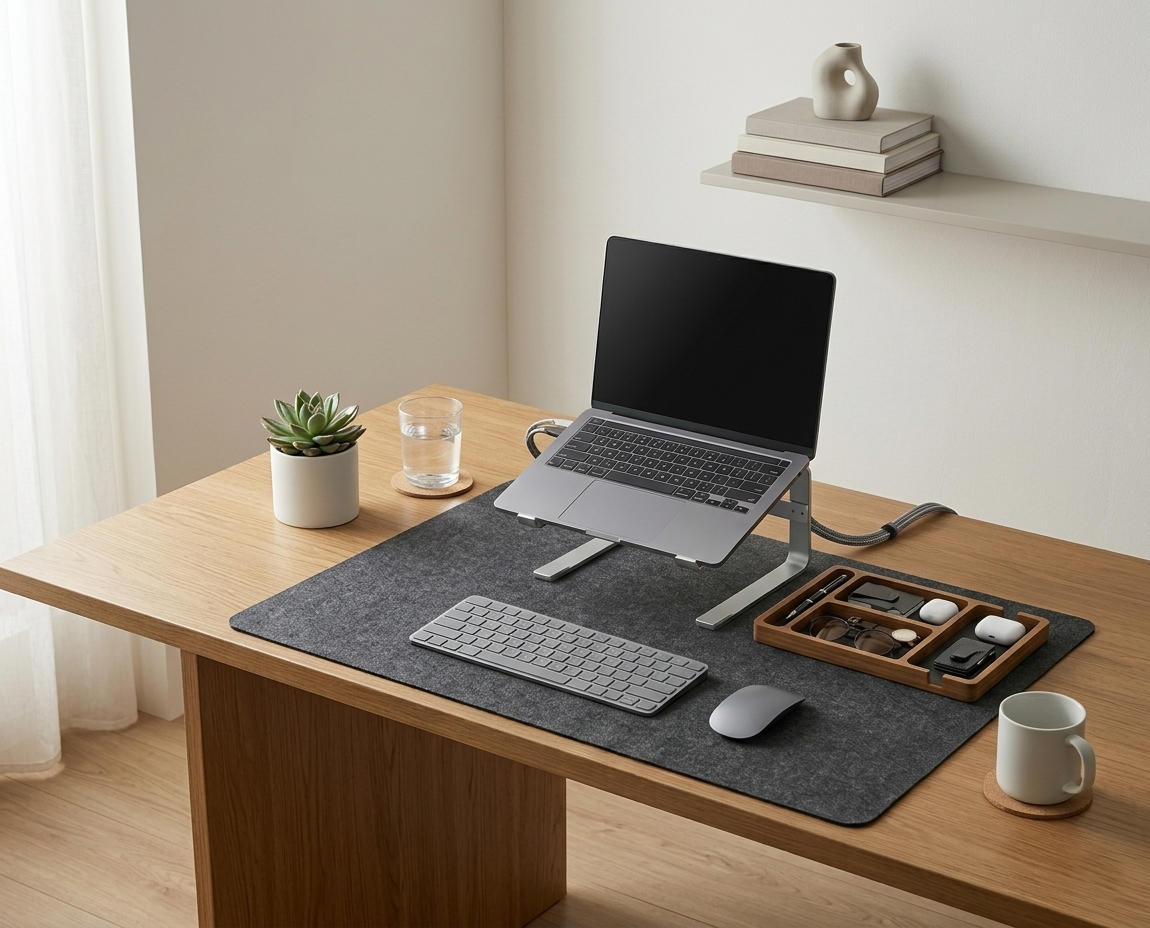
Desk Organization for Graphic Designers
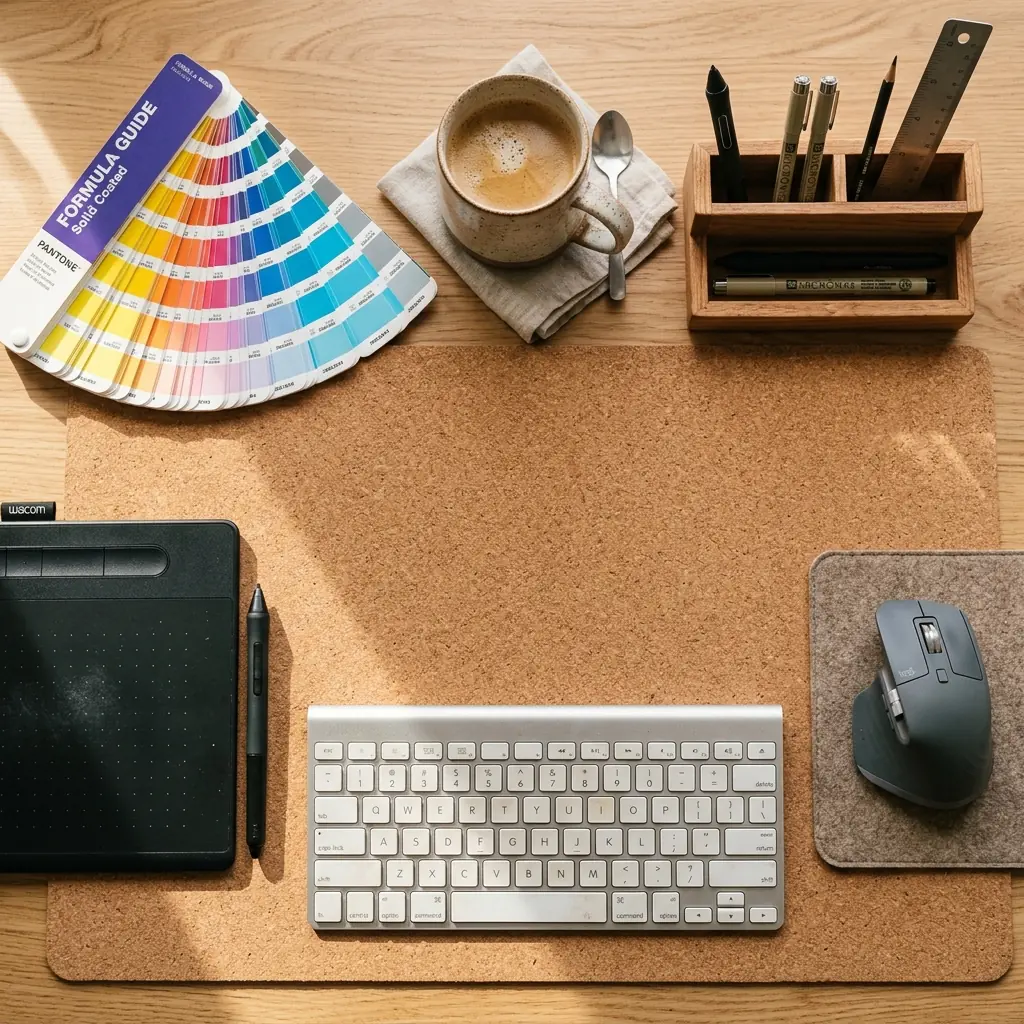
A graphic designer’s desk accumulates more physical tools than most knowledge workers: styluses, Pantone guides, printed mockups, sketch notebooks, color calibration devices, and reference swatches. Without a deliberate organization system, these items colonize the working surface and push the keyboard and tablet into ergonomically compromised positions.
Designer Desk Zone System
Divide your desk into three zones:
- Zone 1 — Active Work Zone (center of the desk mat): Graphics tablet and keyboard only. Nothing else belongs in this zone during work. The tablet and keyboard positions are fixed and never displaced by other items.
- Zone 2 — Reference Zone (top of the desk, behind the monitor arm): Pantone guide, color swatches, and printed reference materials. These are accessed occasionally, not continuously.
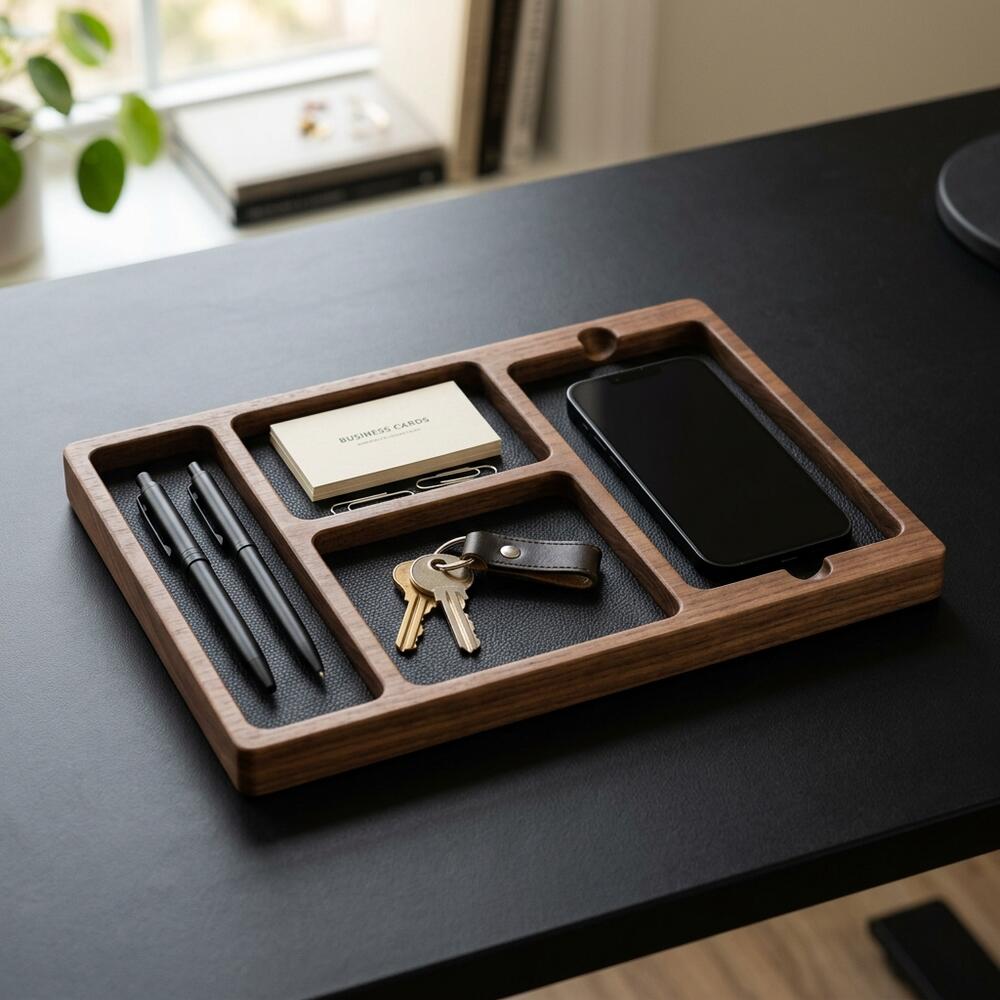
- Zone 3 — Storage Zone (desk organizer, right or left edge): Stylus pen, extra nibs, pencils, scissors, and small tools. A solid wood desk organizer with compartmentalized slots keeps these items accessible without cluttering Zone 1.
For desk organizer options, our solid wood desk organizer setup guide covers how to configure compartments for a designer’s specific tool set.
Keyboard Placement for Designers
Designers use the keyboard differently from writers or developers: keyboard shortcuts are essential, but sustained typing is less common. This makes a compact wireless keyboard (65% or TKL layout) the ideal choice — it places the mouse and tablet closer to the body and reduces the overall desk footprint needed for Zone 1.
- Position the keyboard directly below the monitor, in front of the tablet or beside it (based on workflow)
- Elbows at 90–100° with wrists neutral — the same rule applies regardless of keyboard use intensity
- Keep a wrist rest available for keyboard-heavy phases (layout naming, annotation, client notes)
The Complete Graphic Designer Desk Setup: Step-by-Step
- Install a monitor arm — Position the monitor so the top edge is 2–3 inches above seated eye level at 20–28 inches viewing distance.
- Set ambient lighting to 5,000K–6,500K — Use a monitor light bar; set room lighting to neutral daylight temperature for accurate color perception.
- Calibrate the monitor — Use a hardware colorimeter at least once per month for professional-grade color accuracy.
- Center the graphics tablet below the monitor — Active area aligned with screen center, close to the body, on a cork desk mat.
- Place the compact keyboard in Zone 1 — Flat or negative-tilted, elbows at 90°, wrists neutral.
- Set up a desk organizer in Zone 3 — Stylus, pens, and small tools stored off the mat but within arm’s reach.
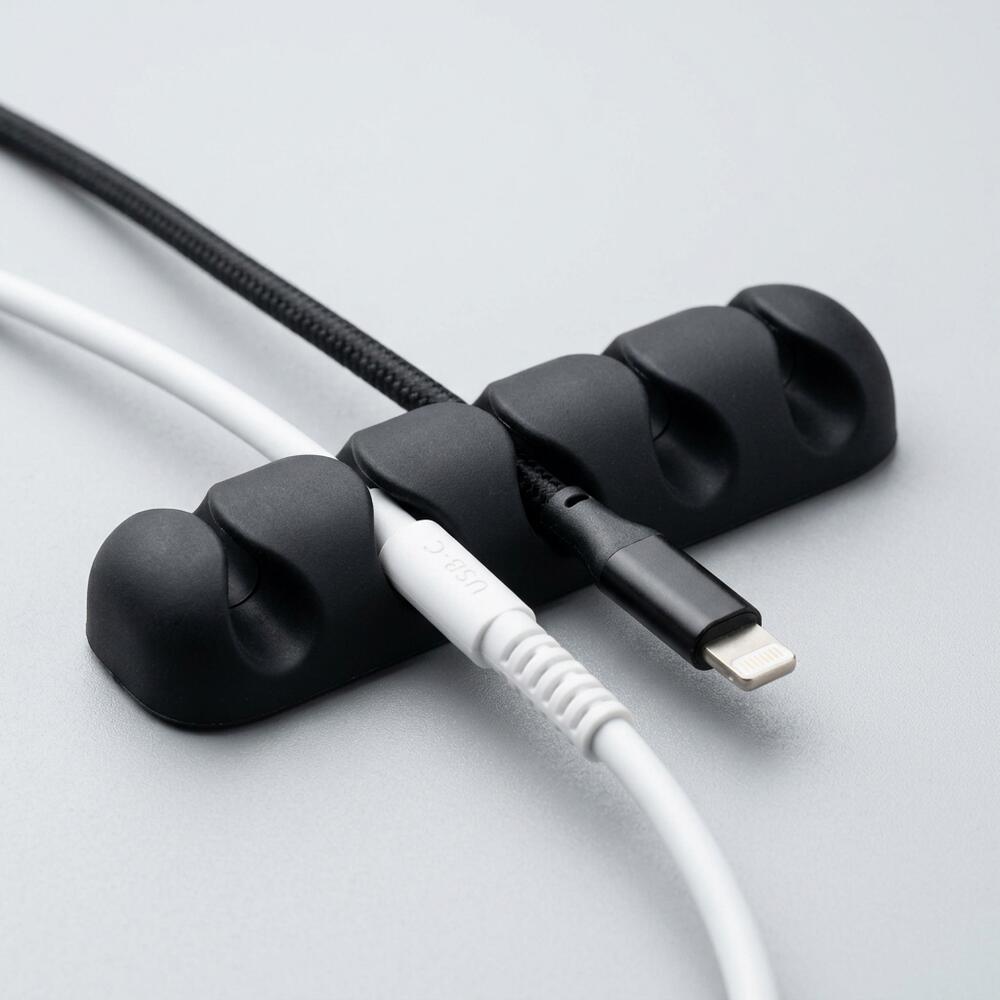
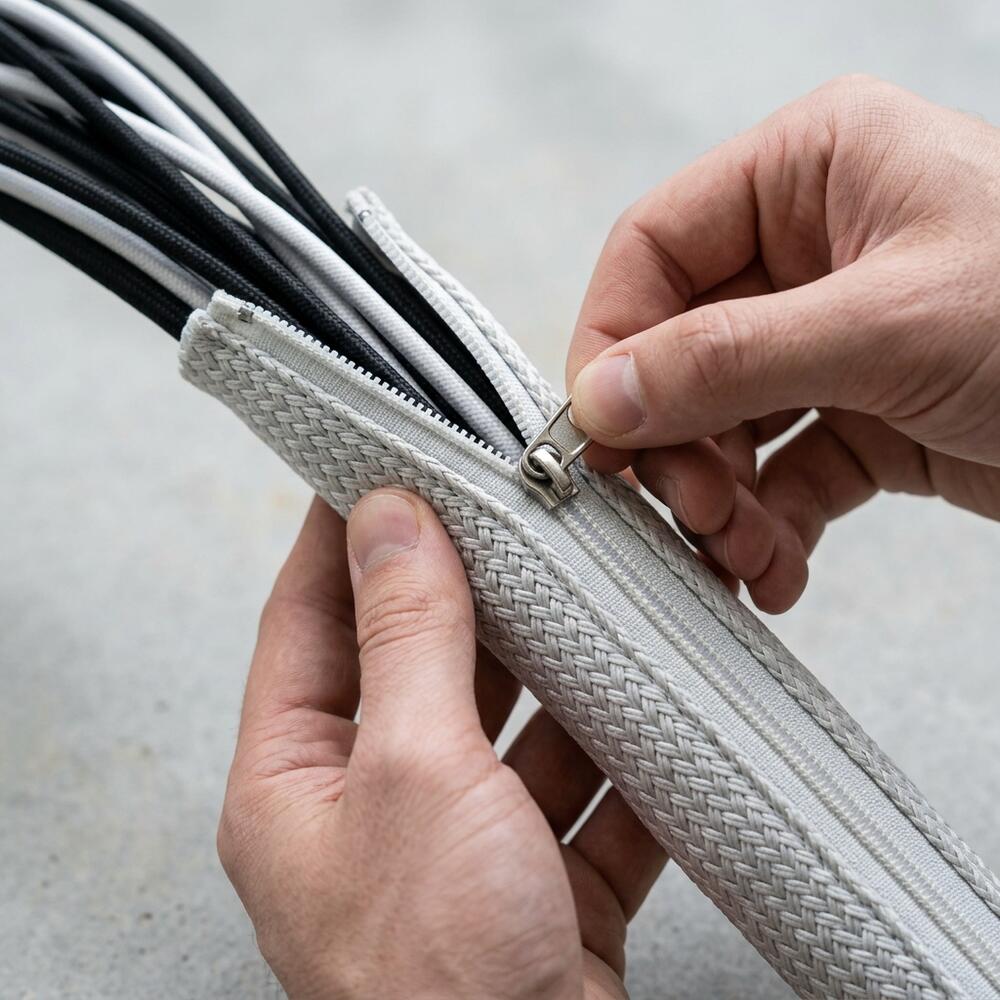
- Route all cables under the desk — Under-desk cable tray and cable sleeve to keep Zone 1 completely free of cable clutter.
- Adjust chair lumbar support — Maintain the natural inward curve of the lower back; feet flat on the floor.
- Apply the 20-20-20 rule — Every 20 minutes, look 20 feet away for 20 seconds. Designers are particularly susceptible to digital eye strain from high-contrast, color-rich screen content.
Designer Desk Setup Checklist
- ☐ Color-accurate IPS or OLED monitor (95%+ sRGB minimum)
- ☐ Monitor on arm — top edge at eye level, 20–28 inches distance
- ☐ Ambient lighting at 5,000K–6,500K (neutral daylight)
- ☐ Monitor calibrated with hardware colorimeter
- ☐ Graphics tablet centered below monitor, close to body
- ☐ Cork desk mat anchoring Zone 1 (tablet + keyboard only)
- ☐ Compact wireless keyboard, flat/negative tilt, elbows at 90°
- ☐ Desk organizer for styluses and small tools (Zone 3)
- ☐ All cables managed under-desk — Zone 1 completely clear
- ☐ Chair with lumbar support, feet flat on floor
- ☐ 20-20-20 eye rule in active practice
Frequently Asked Questions
What monitor should a graphic designer use for their desk setup?
Graphic designers should use an IPS or OLED panel monitor with at least 95% sRGB coverage and a resolution of QHD (2560×1440) or higher. A 27-inch size at 4K resolution provides the pixel density needed for precise design work without requiring excessive zoom. Hardware calibration capability is strongly recommended for professional color-critical work. Always mount the monitor on an adjustable arm for ergonomic height control.
Where should I put my graphics tablet on my desk?
Your graphics tablet should be centered directly below your monitor, as close to your body as comfortable, with the top edge no more than 6–8 inches from the keyboard. Placing the tablet off to one side forces lateral neck rotation every time you shift focus between tablet and screen. The tablet’s active area should be centered with the monitor’s aspect ratio to prevent stroke distortion.
What lighting is best for graphic design work?
For graphic design work, ambient lighting at 5,000K to 6,500K — neutral daylight temperature — is ideal. This matches the D65 white point standard used in professional monitors and print proofing and prevents the warm or cool color bias that lower or higher Kelvin light sources create. Use a monitor light bar to illuminate the desk without casting light on the screen, which causes glare and color distortion.
Do graphic designers need an ergonomic chair?
Yes. Graphic designers spend long hours in sustained focus postures — often leaning forward slightly during precise tablet work — that place significant load on the lumbar spine and hip flexors. An ergonomic chair with adjustable lumbar support, seat depth, and armrests is essential for maintaining the seated posture that prevents lower back and hip fatigue during all-day design sessions.
What size graphics tablet is best for desk ergonomics?
For most graphic designers working on a 27-inch monitor, a medium-sized tablet (approximately 8″×6″ active area) provides the best ergonomic balance. Small tablets restrict arm movement and favor wrist-only strokes, which increases repetitive strain risk. Large tablets on smaller desks force the tablet to be pushed back, increasing reach distance and forward shoulder rotation.
How do I reduce eye strain during graphic design work?
The most effective interventions are: maintaining 20–28 inches of viewing distance, calibrating monitor brightness to match ambient room luminance, applying the 20-20-20 rule consistently, and ensuring ambient lighting is at 5,000K–6,500K to match monitor white point. Reduce display contrast slightly from the factory default — 100% contrast forces the eye to work harder when shifting between bright highlights and dark shadows in design layouts.
Should graphic designers use a cork desk mat?
A cork desk mat is an excellent choice for graphic designers. It provides a non-slip, lightly cushioned surface that keeps the graphics tablet and keyboard in a fixed position — preventing the subtle drift that occurs on bare desk surfaces during long sessions. Cork’s natural texture also reduces forearm contact fatigue during sustained tablet work and defines the Zone 1 active work area visually.
Conclusion
A great desk setup for graphic designers balances two equally important demands: ergonomic protection for the body, and precision support for the craft. Your monitor must be color-accurate and ergonomically positioned. Your graphics tablet must be centered, close, and on a non-slip surface. Your lighting must protect both your eyes and your color perception. And your desk surface must be organized so that creative work flows without physical or visual friction.
Start with the two highest-impact changes: install a monitor arm to bring your screen to eye level, and center your graphics tablet directly below the monitor. Those two adjustments alone will resolve the most common ergonomic complaints I see in designer workspace evaluations. For the complete environmental layer that supports your creative focus — lighting, acoustics, and air quality — see our workspace environmental design guide.
For a broader look at how ergonomic principles apply to your entire setup, our complete ergonomic desk setup guide covers the foundational rules that underpin every profession-specific configuration.