


You spend thousands of hours a year interacting with your keyboard, yet it is often the most poorly positioned tool on the entire desk. Pushing your keyboard too far away, angling it upward, or typing with your wrists resting heavily on a hard edge are guaranteed pathways to carpal tunnel syndrome and chronic shoulder tension. The solution is implementing precise ergonomic keyboard placement that works in harmony with your body’s natural mechanics. In this guide, I will break down the exact angles, distances, and adjustments required to eliminate upper body strain and make typing a completely pain-free experience.
Alex Thornton is a Certified Ergonomics Consultant and Workplace Wellness Specialist. After earning a master’s degree in Human Factors Engineering from Cornell University and certification from the Board of Certification in Professional Ergonomics (BCPE), Alex spent eight years as the lead ergonomics advisor for a Fortune 500 tech company. In 2020, Alex founded “Ergonomics Everyday,” a consultancy that has evaluated over 500 workspaces. You can learn more about their consulting experience on the About Alex Thornton page. Their hands-on experience ranges from advising startups on cost-effective ergonomic solutions to redesigning entire office floors for maximum employee comfort and productivity.
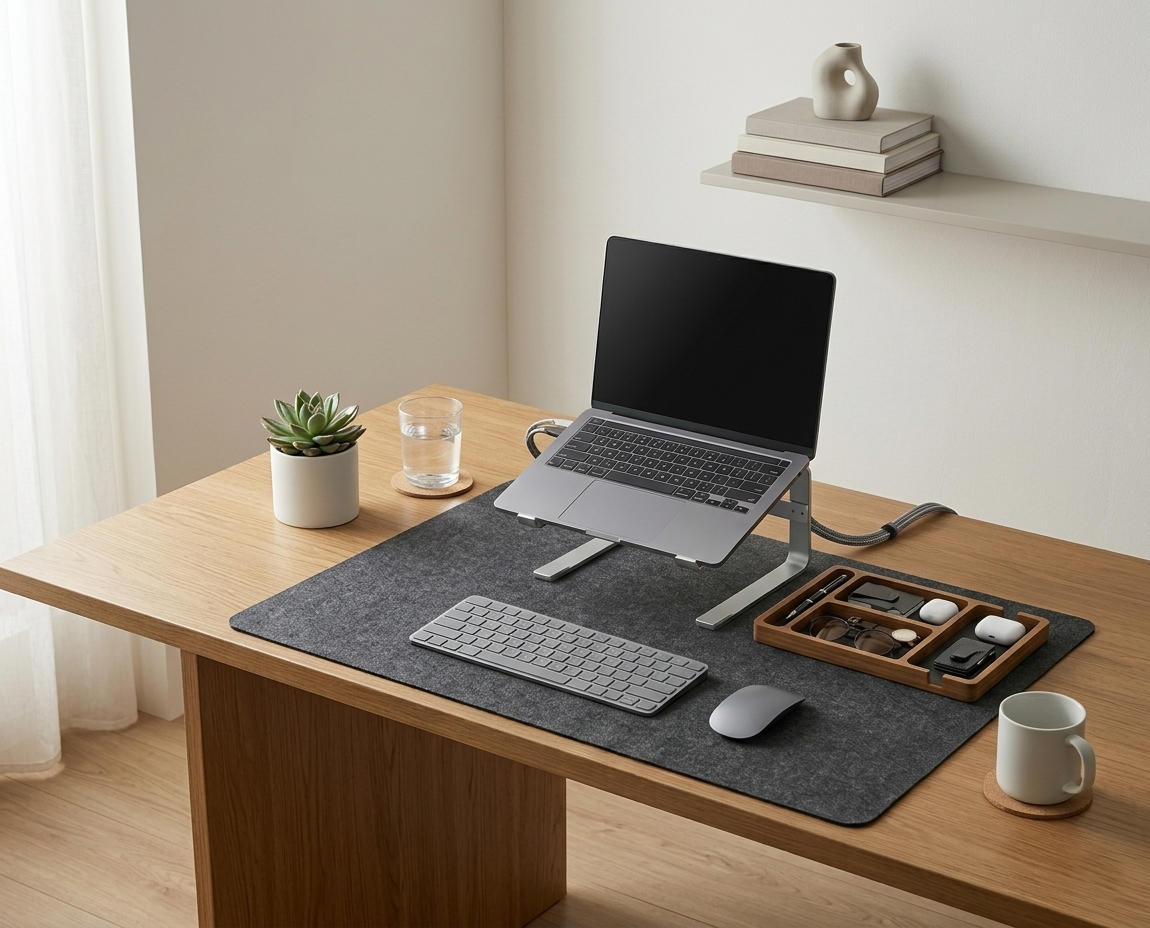
If you’re looking for a starting point to fix your setup, the Minimal Desk Starter Kit includes everything you need for a clean, ergonomic workspace, providing the perfect foundation and desk mat to support your wrists correctly.
What Is the Proper Ergonomic Keyboard Placement?
Proper ergonomic keyboard placement requires positioning the device so that your elbows are bent at a 90 to 110-degree angle and your wrists remain completely straight and neutral. The keyboard should sit approximately 4 to 6 inches from the front edge of your desk, centered directly in front of your body’s midline, allowing your shoulders to remain relaxed without reaching.
Before adjusting your typing surface, you must ensure the rest of your workstation is calibrated. An ergonomic workstation is a workspace configured to support the body’s natural posture, reduce strain, and prevent repetitive stress injuries during prolonged work. A core component of this is a properly utilized desk setup, which is the complete arrangement of furniture, tools, and accessories optimized for comfort, productivity, and health.
During a workspace audit for a 200-person engineering team, I found that over 65% of employees placed their keyboards more than 10 inches from the desk edge, forcing a hunched “forward reaching” posture that directly correlated with severe upper back pain.
- Prevents “ulnar deviation” (bending the wrists outward).
- Eliminates “extension” (bending the hands upward) which pinches the median nerve.
- Reduces the load on the trapezius and levator scapulae muscles in the neck.
- Allows for faster, more accurate typing by reducing hand travel distance.
According to the OSHA Computer Workstations eTool, improper keyboard positioning is a primary risk factor for musculoskeletal disorders. “Ergonomic keyboard placement ensures that the hands, wrists, and forearms remain in a straight, neutral line, completely eliminating the mechanical stress of joint compression during repetitive typing.”
What Is the Best Distance for Your Keyboard?
The best distance for your keyboard is exactly where your hands naturally fall when your upper arms hang relaxed at your sides and your elbows are bent at 90 degrees. For most standard desks, this places the front edge of the keyboard approximately 4 to 6 inches (10–15 cm) from the edge of the desk surface nearest to your stomach.

This 4 to 6-inch gap is critical. It provides just enough space to rest your forearms or the heel of your palms on the desk surface (or a soft desk mat) during brief pauses in typing, but it prevents you from overreaching. If you push the keyboard further back, you must lean your torso forward or fully extend your arms, breaking the 90° Elbow Rule.
The 90° Elbow Rule dictates that elbows should be bent at 90 to 100 degrees, resting on desk or chair arms, with wrists kept neutral and flat. If you cannot achieve this angle because your desk is too high, you must adjust your chair. We cover this extensively in our Standard Desk Height Guide.
Should a Keyboard Be Flat or Angled Up?
A keyboard should always be flat or angled slightly downward (a “negative tilt”), never angled upward. Propping up the back of your keyboard using the plastic kickstands forces your wrists into extreme “extension”—bending backward toward your forearm—which compresses the carpal tunnel and inflames the tendons over time.
This is one of the most persistent ergonomic myths. The kickstands on the back of old keyboards were originally designed to make it easier for untrained typists to visually see the keys, not to provide ergonomic support. If you know how to touch-type, those kickstands are actively harming your wrists.
A “negative tilt” means the section of the keyboard closest to you is actually higher than the back section. This promotes a perfectly straight line from your elbow to your knuckles. If your keyboard cannot achieve a negative tilt, keeping it completely flat on the desk is the next best option.
| Keyboard Angle | Wrist Posture | Ergonomic Verdict |
|---|---|---|
| Positive Tilt (Back raised) | Extended (bent backward) | Dangerous; causes compression |
| Flat (0 degrees) | Neutral/Straight | Good; safe for long sessions |
| Negative Tilt (Front raised) | Neutral to slightly flexed | Optimal; maximum tendon relaxation |
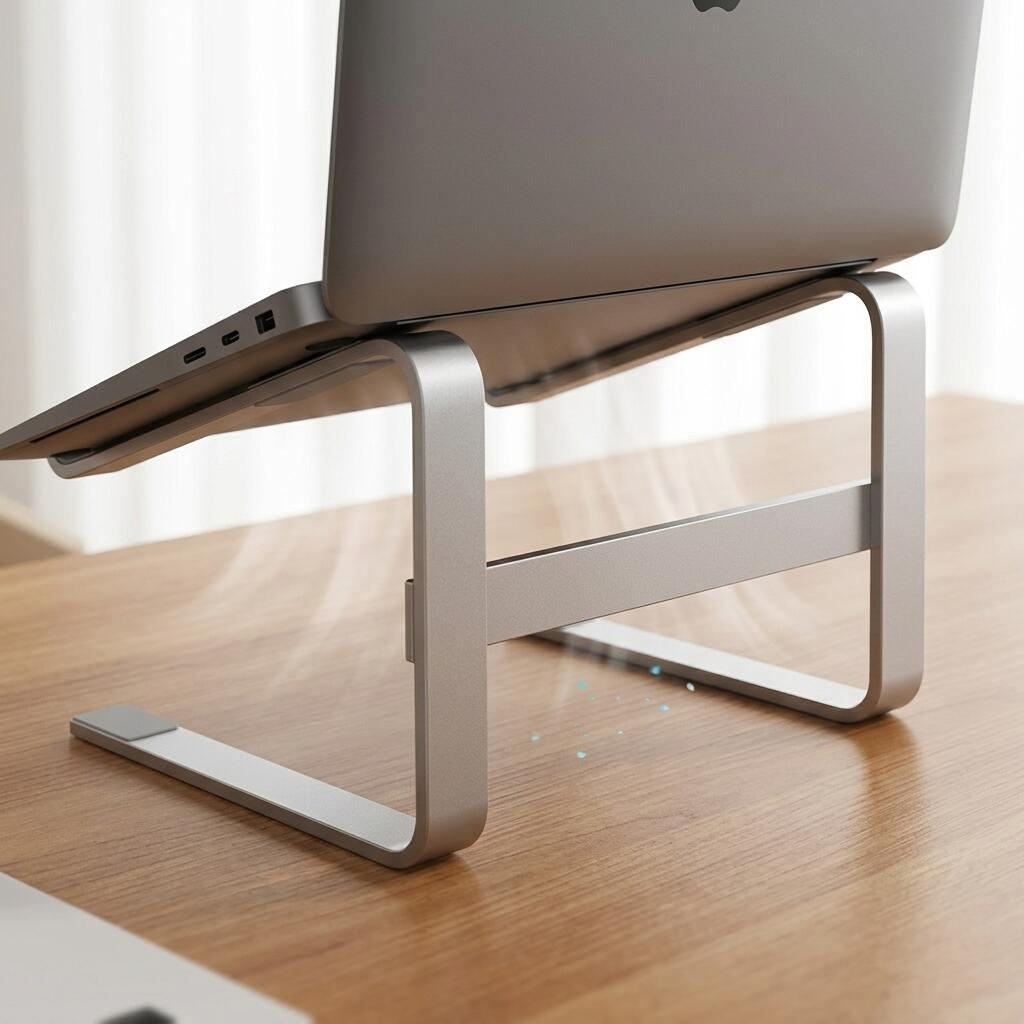
If you are typing on a laptop, achieving a flat keyboard while maintaining proper screen height is impossible without accessories. You must elevate the laptop and use an external keyboard. Read our Monitor Arm Setup Guide to understand how to decouple your screen from your typing surface.
How Do You Center Your Keyboard?
You center your keyboard by aligning the “alphabetic center”—typically the space between the ‘G’ and ‘H’ keys—directly with the midline of your body and the center of your primary monitor. Do not align the physical center of the entire keyboard device with your body, especially if it includes a numeric keypad on the right side.
If you center the entire device on a full-sized keyboard, your hands will be forced to reach to the left to type letters, causing asymmetrical tension in your shoulders and forcing your right arm to reach uncomfortably far out to grasp the mouse.
- Sit straight in your chair facing your primary monitor.
- Place the keyboard on the desk.
- Align the ‘B’ or ‘H’ key directly with your belly button.
- Place your mouse immediately adjacent to the right (or left) edge of the keyboard.

By minimizing the distance your hand must travel to the mouse, you prevent rotator cuff strain. Workspace productivity refers to the efficiency and output quality achieved through an intentionally designed and organized work environment. Centering your tools is the definition of physical efficiency.
The Importance of the Desk Surface
Even with perfect ergonomic keyboard placement, resting the sensitive undersides of your wrists against a sharp, hard wooden or glass desk edge will cause “contact stress.” This constant pressure damages the soft tissues and nerves passing through your carpal tunnel.
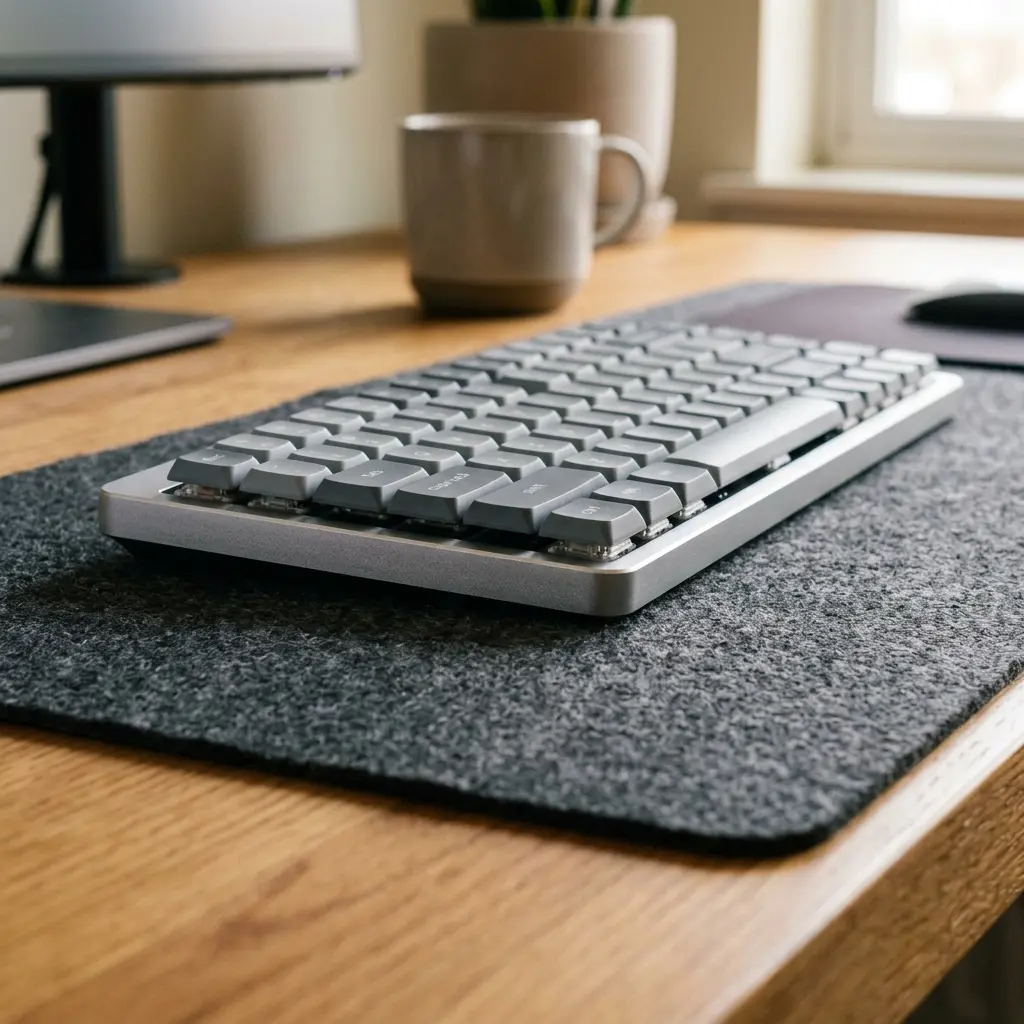
To combat this, you should place your keyboard on a high-quality desk mat. It provides a subtle, consistent layer of cushioning that protects your skin without being so soft that your wrists sink into poor alignment.
For a deeper dive into protecting your hands, including the use of proper wrist rests, read our related cross-cluster guide: Wrist Strain Prevention: Ergonomic Keyboard & Desk Mat Setup.
Ergonomic Keyboard Placement FAQs
1. Should I use a keyboard wrist rest?
You should only use a wrist rest during pauses in typing, not while actively striking the keys. Resting your wrists on a pad while typing locks them in place, forcing you to bend your hands side-to-side to reach keys, which causes strain. When typing, your hands should float.
2. Are split ergonomic keyboards better?
Yes, split keyboards are excellent for individuals with broad shoulders. A standard straight keyboard forces your hands close together, which can cause you to bend your wrists outward (ulnar deviation). A split keyboard allows you to angle the halves to match the natural straight line of your forearms.
3. What is the correct height for a keyboard tray?
A keyboard tray should be positioned exactly at your resting elbow height, allowing your forearms to be parallel to the floor. The primary benefit of an articulating keyboard tray is that it can easily drop below the desk surface and be locked into a negative tilt position.
4. Should my mouse and keyboard be on the same level?
Yes, your mouse and keyboard must absolutely be on the same level plane. Placing your keyboard on a tray and your mouse up on the desk forces you to constantly lift your arm and reach outward, which rapidly leads to shoulder fatigue and neck pain.
5. How close should the mouse be to the keyboard?
The mouse should be placed as close to the side of the keyboard as physically possible without restricting movement. If you use a full-sized keyboard but rarely use the number pad, consider switching to a “tenkeyless” (TKL) keyboard to bring the mouse closer to your body’s centerline.
6. Why do my fingers tingle when I type?
Tingling or numbness in the fingers (especially the thumb, index, and middle fingers) is a classic symptom of median nerve compression, often associated with carpal tunnel syndrome. This is frequently caused by typing with the wrists bent upward (extension) or resting them heavily on a hard desk edge.
Conclusion
Mastering ergonomic keyboard placement is the most direct way to eliminate upper body pain at your desk. By adhering to the 4 to 6-inch distance rule, keeping the keyboard flat or negatively tilted, and centering the alphabetic keys with your body, you ensure that your arms and wrists remain in a relaxed, neutral state. Workspace productivity is fundamentally linked to your physical comfort. This exact problem—the friction of working on harsh, misaligned surfaces—is why we designed the Minimal Desk Starter Kit. It provides the premium cork mat and structural alignment tools you need to build a flawless foundation for your best work.